




Showing posts with label Dessert. Show all posts

Gluten/Dairy Free Birthday Cake.

Sunday, April 22, 2012

I have a daughter who has food allergies and let me just tell you it SUCKS!  Yes, my Dad if he was reading this would be emailing, texting, calling me, telling me it is unladylike to be using such language especially if it is in text because "once its written down Laura you can never take it away..."

I know... I know...I would tell him but it does! 

Not only does it suck for her because she get horrible eczema from certain foods and because she is only 2 and wants to eat what everyone else is eating but it sucks for me too because its like a 3rd job trying to manage her food intake...

Any who my good friend Brittany, who threw the Seashell 40th Birthday with me, made the cake for the evening.  She made it gluten free and IT WAS DELICIOUS.  I emailed her to get the instructions and here's what she sent me.  I thought I would share.


Hi Miss L,

Here is the recipe for Miss Cosette’s cake:

Pamela’s Gluten/Dairy Free Chocolate Cake Mix:
I added the following ingredients and beat with electric mixer on medium:
½ cup coconut oil
3 eggs (recipe calls for 2, but you can use 3 to make lighter J)
Pre-heat oven to according to package instructions
I greased the cupcake pan with coconut oil before dividing the cake mix
I baked it for about 50 minutes (but all oven temps vary)
I baked the cake a night ahead of time, let it come to room temp and placed saran wrap around both halves (and that into a gallon freezer bag) and placed into the freezer. I took it out about 2 hours before I whipped up the frosting

Pamela’s Vanilla Frosting (Gluten-Free)
I used an electric mixer on medium until all was blended (then on low when added in water)
I used 2 bags as 1 bag really didn’t cover the job J, therefore I doubled everything
I used 2 cups of room temperature butter (Really light, I know)
2 teaspoons of almond extract (can use more depending upon your taste palate)
2 tablespoons of water (add slowly) can add more water depending upon the thickness you prefer
I placed all the frosting in one gallon zip lock. I pushed all frosting to one of the bottom corners of zip lock bag and then cut a corner off (to make a mock frosting tip).
Frost as you desire J

I used a Giant cupcake tin: they are available at Michael’s, Bed, Bath & Beyond

Me Again....
I made this recipe for Claire and took some cupcakes to school for her to be frozen so she could have a treat when the other kids did too.   I used Vegetable Shortening though instead of butter for the frosting to make it completely dairy free.  The texture and the flavor turned almost the same as using butter.

This picture sucks too...LOL Please forgive ;)

Happy Gluten/Dairy Free Baking ;)

Sucre King Cakes for Mardi Gras

Wednesday, February 15, 2012


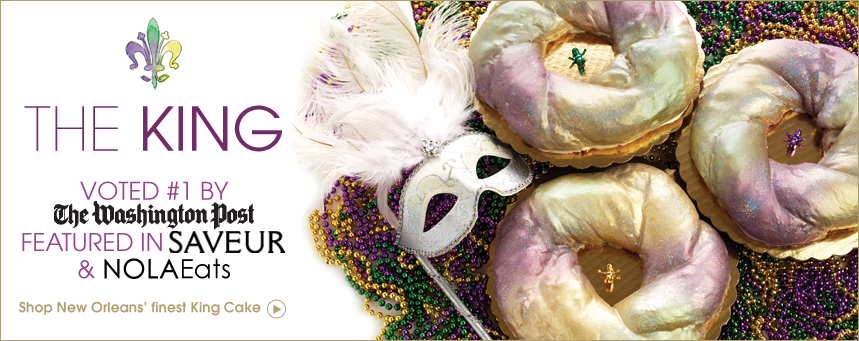
I have seen Sucre in NOL and then I saw them again in this months Garden and Gun (my current favorite magazine).  I ordered a gift basket for my Dad's birthday and he said it was fabulous.

For my family I ordered the famous king cake. 

Here's a little bio from Sucre: "The king cake is as rich in history as it is in flavor. Since the 1800s, New Orleanians have celebrated the beginning of the Carnival Season with a “King’s Cake” on Twelfth Night. A small plastic baby is inserted in the cake, and the reveler who finds it is said to have good fortune for the year. The recipient then continues the festivities by having another party and providing a King Cake. To read more about the Washington Post article, please visit our Blog post."
 My king cake should be getting here this week. I'll let you know who gets the baby.
 Mardi Gras is next Tuesday February 21st.  You still have time to order.  


Love = Paula Deen's Sour Cream Pound Cake

Tuesday, February 14, 2012

LOVE EQUALS my hubby, my children, my family and friends and Paula Deen's Sour Cream Pound Cake.

This recipe rocks people. The only thing that I changed is I baked for about 50 mins.  Nothing worse DRY CAKE!  My dad taught me that. LOL.


Ingredients

  • 1/2 pound (2 sticks) butter
  • 3 cups sugar
  • 1 cup sour cream
  • 1/2 teaspoon baking soda
  • 3 cups all-purpose flour
  • 6 large eggs
  • 1 teaspoon vanilla

Directions

Preheat oven to 325 degrees F.
In a large mixing bowl, cream the butter and sugar together. Add the sour cream and mix until incorporated. Sift the baking soda and flour together. Add to the creamed mixture alternating with eggs, beating each egg 1 at a time. Add the vanilla and pour the mixture into a greased and floured 10-inch tube pan. Bake for 1 hour 20 minutes.


Last Minute Dessert?

Wednesday, November 23, 2011

I had this at a bridal shower a couple of weeks ago and it was delicious.  
I needed a last minute, easy, no bake dessert for tonight and this is what I made.

 Buy chocolate pudding, brownies, Heath Bars (crush them) , whip cream ( I did make this fresh).
 Layer it all in a glass bowl starting with brownies first.

Done. Easy.  Kids can help too!


This Cake is Witchin'

Friday, October 28, 2011

Check out this Witchin' Cake and lots of other cool things 

Easy Summer Cobbler

Monday, August 15, 2011

My mom gave me this recipe when I first moved to California and it has become one of my easy, go to desserts. It is great for all the fresh fruits of the summer. 

1 Cup of Flour
1 Cup of Sugar
1 Cup of Milk
1 Teaspoon Baking Powder
1 Stick of Salted Butter
3 Cups of Fruits Your Choice

For my fruit I like to use a mixture of blueberries, raspberries, and blackberries.  Peaches are good too.


Melt Butter in Oven until sizzling. Mix 1 cup sugar, 1 cup flour, 1 teaspoon baking powder and 1 cup milk.   Pour in pan over melted butter - DON'T STIR! Pour fruit on top and sprinkle with sugar. Cook at 350 degrees for 30 minutes.

Serve warm with vanilla ice cream.   Add a sprig of mint for decoration.


Summer Dessert: Grilled Peaches!

Friday, July 1, 2011

This is so easy and so yummy!  My hubby loved them.  

Get some summer peaches.  Cut in half and pit.  Sprinkle some cinnamon, nutmeg and a little sea salt on them and pop them on the grill until they are soft.  

I used my new Grill Pan that I am a huge fan of because I don't have to be outside in the 120 degrees heat all summer and can still get the same effect as my grill.   

You could add some ice cream to your peaches too!


Easy 4th of July Treats!

Sunday, June 12, 2011

Easy little fun treats that the kids loved making.


I saw a pic of something similar to these on Pinterest and I wanted to give them a try.  The ones I saw had lollipop sticks in the Oreo's but that didn't work for me.  The stick kept breaking the cookie. 


I used Red, White and Blue (You can purchase below) straws with the marshmallows to add a festive touch.

The marshmallow and Oreo version of these were so easy to make. 

I bought white chocolate chips (you can do dark too!) and picked the colored sprinkles I wanted to use.

The first go around I melted the chocolate on the stove. 
WRONG!
  It burned the chocolate and turned it brown... So I  put the white chocolate in the microwave for about for about 1 minute and it melted perfectly.

Dipped the marshmallows in the chocolate
then rolled them in the sprinkles.  

With the Oreos I dipped one side in the chocolate then dipped them in the sprinkles. I also used candy pieces.  
You can really use whatever you want to decorate.

I laid the Oreos on wax paper to dry. They set in about 30 mins.  Bingo had a fun little dessert for a BBQ!

Want the Straws...Purchase Here!


Quanity


Valentine's Day Cake Pops

Sunday, January 30, 2011

Valentine's Day Bear Cake Pops

This came to my inbox last week and before I opened it I thought "Yeah, so cute! I will have to make these for Lily's class for Valentine's Day." I was thinking (before I saw the pics) they would be like cute little balls with icing and red and pink sprinkles. Wrong... They are even better then that.  Look at these darling little Bear Cake Pops from my favorite www.Bakerella.com

I don't think I will attempt this on my first "cake pop" experiment but I am determined one day to make a simple cake pop (i.e. a ball with icing and sprinkles *wink*wink*).  Thought you would enjoy a little "eye cake" this morning.   Click here to see how she does it ;)  Happy Cake Popping!

P.S. On a side note... I have had a couple people requests our Valentine's Day Printables but they have NOT left an email address...If you don't leave your email address I have no way of sending them to you ;( 


Photos by Bakerella!

Day 6, 5, 4...Let's get the bake on...Christmas Cookies ;)

Tuesday, December 21, 2010

I know I missed a few days but I have been busy, getting ready for this weekend and for my parents who are coming TODAY! YEA!!! This is a different Christmas for us this year. It is the first time in 32 years, I have not been in the house, I grew up in, for Christmas morning...

My parents are so sweet...Santa still comes there every Christmas morning...

Any-who, with life things change and we are excited to start our own traditions and are thrilled not be getting on a plane with the little ones...

So here's my Sugar Cookie Recipe, which I kind of made up combining a couple I liked... 
I think they turned out really good! 

Sugar Cookies
2 Cups of Flour
1/4 Cup Sugar
1 1/2 Sticks of Butter
1/4 Teaspoon of Sea Salt
1 Teaspoon of Vanilla

Cream butter in mixer, add in sugar, salt, vanilla and flour until thick. 
Roll or hand press out your dough. 
Get your favorite cookie cutters out and cut away.  
The trick is to leave them thick at least an 1/4 plus inch!


Place on a cookie sheet and place in oven on 350 degrees for about 8 Mins. 
DO NOT Over cook! You know how I am about things being dry! LOL!


Take off cookie sheet, let them COOL COMPLETELY and royal icing them up! 
I used the Royal Icing recipe from Joy of Baking!

Royal Icing Using Egg Whites:

2 large (60 grams) egg whites
2 teaspoons fresh lemon juice
3 cups (330 grams) confectioners (powdered or icing) sugar, sifted
 
To get them the perfect color I used this Wilton Icing Coloring.
I bought at Joanne's Fabrics of all places.
Let cookies sit for at least 2 hours for icing to harden...then enjoy!

 Please excuse my transistion from stars to pumpkins...I forgot to take pics for the stars!

Merry Christmas!

Day 10... Holiday Cookies by Bakerella!

Wednesday, December 15, 2010

Can you say this girl has some crazy talent or what!?!?  Look at these cookies!  This is from Angie over at Bakerella.  She is amazing.  Here are some of her Holiday cookie designs.  She even has a  tutorial on how she makes and decorated these cookies, which includes a PDF download for the template, so you can too!  Want to WOW somebody with your creative cookie talent?  
Go learn some cool tricks from Angie on her amazing blog!  

Oh...P.S.  The video below is her on the Today show making her famous cake pops!

Photo by Bakerella

Photo by Bakerella

Photo by Bakerella


Days 16 and 15! Candy Table and Printables.

Friday, December 10, 2010

Day 16!
Remember my hubby's client appreciation party last week?
Well... I created my first candy table.  It was so much fun!

Candy used: Candy Canes, Christmas Kisses, Hard Candy, Red Vines and Carmel Corn.
Containers were  from Nashville Wraps


Planning a Dessert or Candy Table for your holiday party.
  Download printable "Treat Table" labels here!


DAY 15

I found this awesome app on my iphone and wanted to share a pic.
App is called Lo-Mob

Before!

After!

Very 1950's right?

Sweet Berry Pie Recipe.

Sunday, October 17, 2010

 Walt came home with lots of fresh blueberries and raspberries yesterday so I made a Berry Pie.  
Here's What You Need
2.5 Cups Fresh Blueberries
1Cup Canned Blueberries
1.5 Cups Fresh Raspberries
2 Tablespoons Lemon Juice
3/4 Cup Sugar
1/4 Teaspoon Cinnamon
1/4 Teaspoon of Vanilla
2 Tablespoons Melted Butter
1 pie shell (you can make your own)

For Crust
2 Cups of Flour
1/2 Cup of Sugar
1/2 Cup of Melted Butter

Here's How You Do It
 Combine all berries, lemon juice, sugar,
cinnamon and butter together in a bowl.
Stir well and then pour into pie shell.

Combine flour, sugar and butter and
knead together with hands. Place on top on fruit.  It should be
crumbly (not sure if this is a word...but its a good description ;)
Put in freezer for about 15 mins to set.

Pre-Heat to 425 degrees. Bake for 10 mins.
Reduce to 350 and bake for approx. 20 mins.  Watch to make sure doesn't burn.
Side Note: The pie gets very watery.  I slit a little hole in the side to drain some out before I served. 


Sweet Berry Pie

LinkWithin

Related Posts with Thumbnails